style

Wear: Spring in Mexico

Super fun and comfortable outfit for a busy mom. Flat sandals, floral leggings, and a loose black shirt.

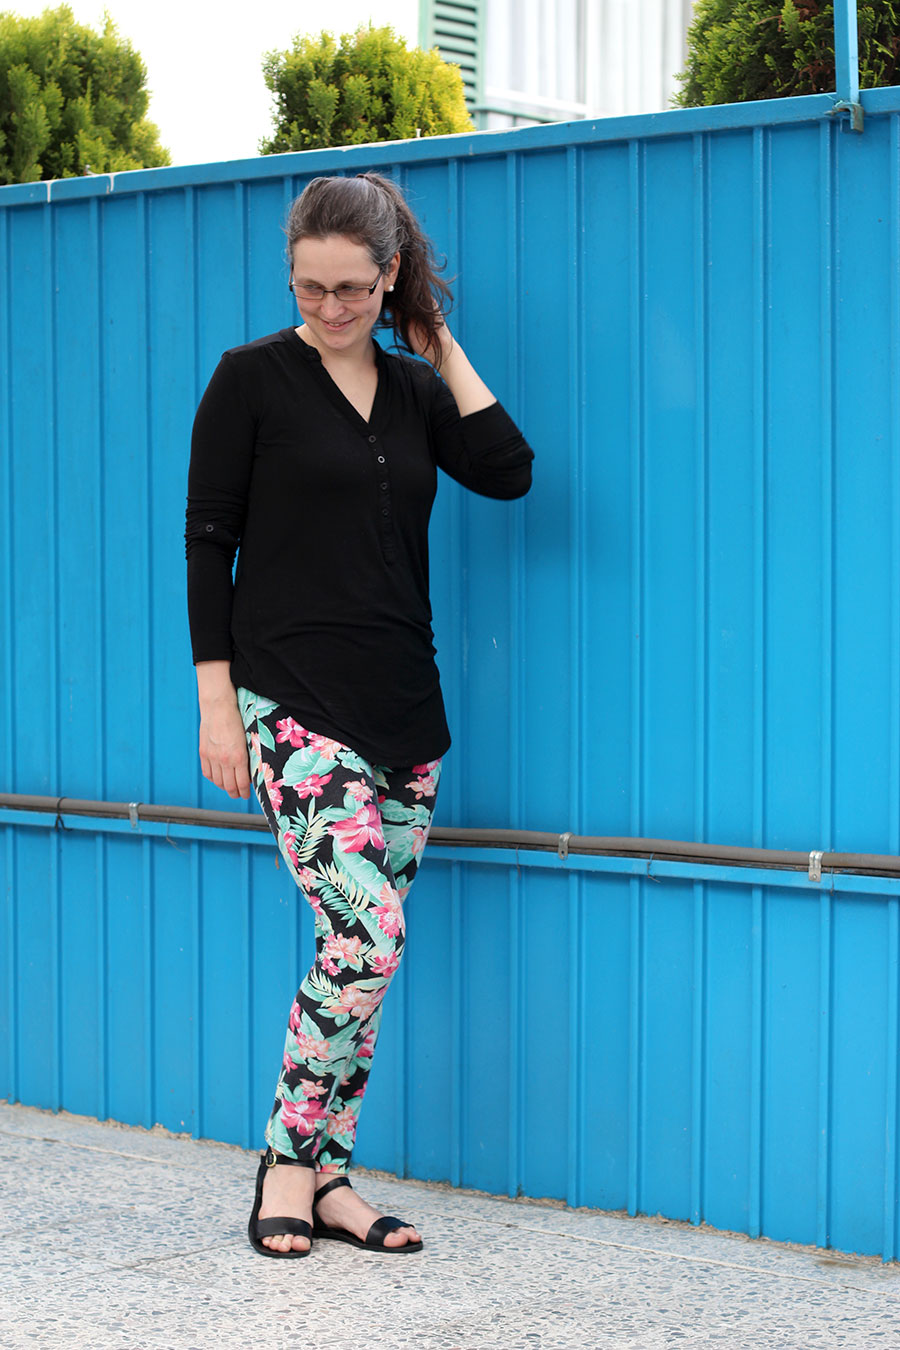
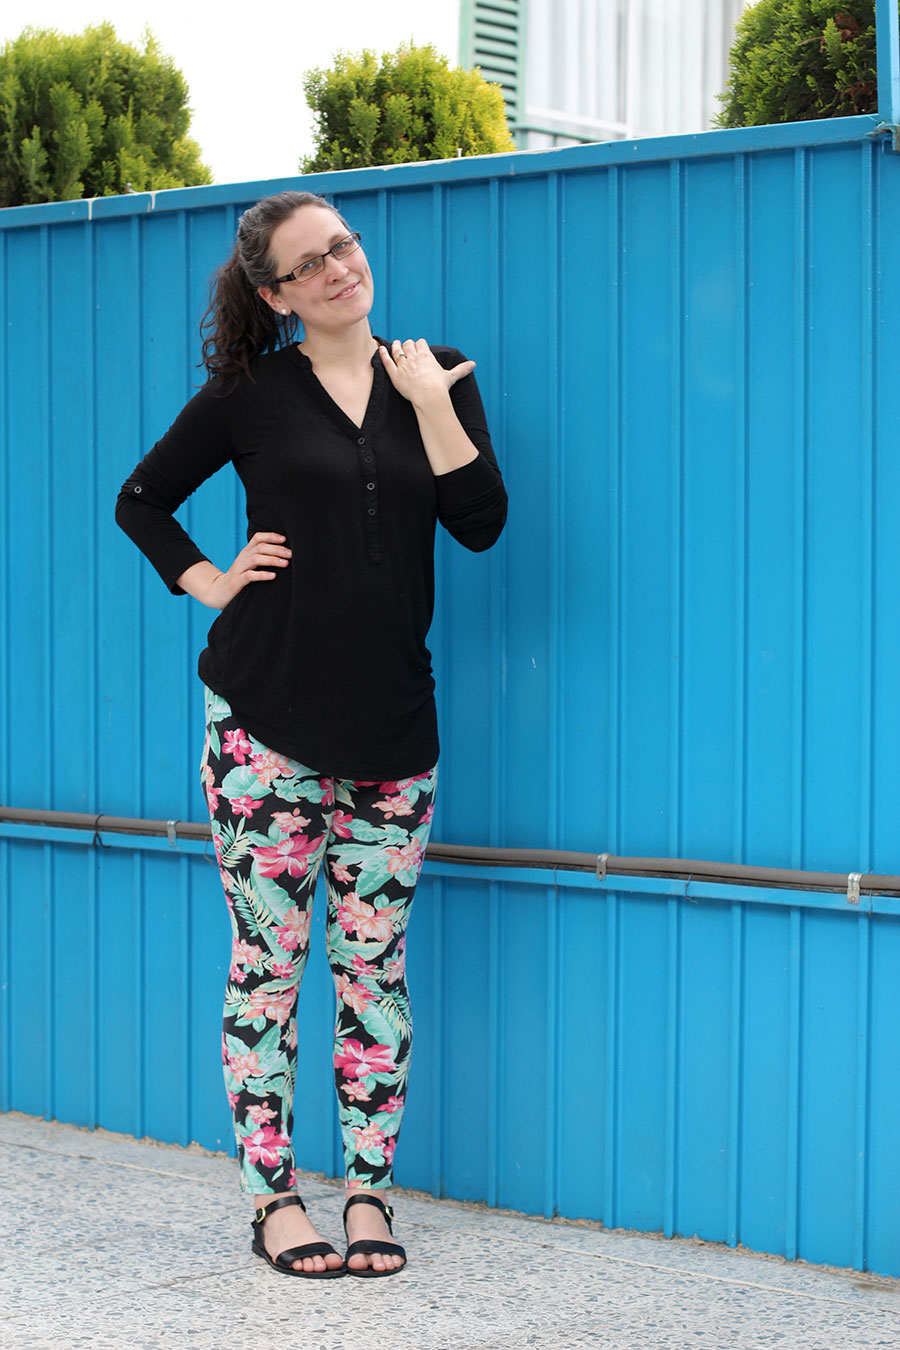
Flowers!!! Colors!!! Sandals!!! Oh my god guys, I am just too excited for spring.

Being in Mexico brought a taste of warmth back into my life and I just had to capture the moment. It's been so long since I've done an outfit post. This shoot was completely random and unplanned (read: no makeup and crazy hairdo). I just wanted to remember the vivid colors, just in case the last few snowfalls back home discouraged me.

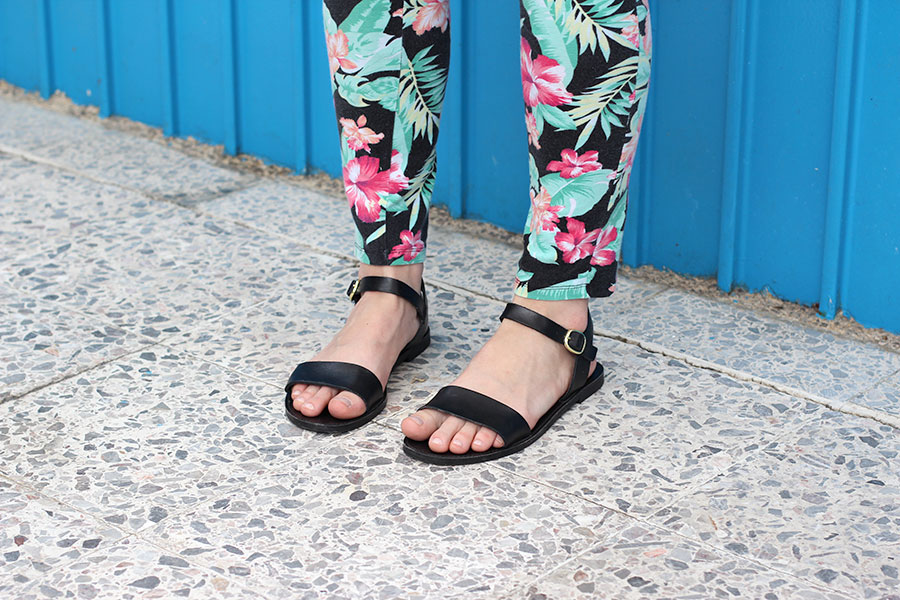
Ok so this may not be the fanciest of outfits, but it's so fun and so comfortable. I especially love my new sandals from Steve Madden. It was the first pair of shoes I bought there and I did find they were a bit on the pricey side, but after wearing them for 2 weeks I can tell you it was well worth the money. I just hope they last and retain their quality for a long time!

As for the leggings, they're an old pair I had lying around. As a matter of fact, they're getting a tad washed out. Tell me you didn't notice.

The shirt is new though, I got it at Bikini Village a couple of months ago. I'm so in love with the casual style, length and its loose fit. The fabric is super light and soft, too bad it doesn't come in vibrant colors, I would have bought them all!


WEARING

Sandals: Steve Madden
Leggings: Old
Shirt: Bikini Village
Earrings: Winners

Steve Madden black sandals with floral leggings.
Bring colors into your outfit with flower leggings!
Julie Claveau of xfallenmoon wearing floral leggings, black shirt and Steve Madden sandals in black. Super comfortable outfit for a busy mom.

Nail Art: Black on Silver, Dotted

Black and silver nail art; silver base, black line, white dots.

It's been so long since I've shared any nail art! To be honest, I haven't done any in a while. I don't know why, I guess I've just been prioritizing other things lately. I miss it though, it's always fun to take a few minutes a week to have a girly moment.

For this nail art I didn't really plan anything. I just picked a random color and painted my nails and went from there. It's always fun to experiment without a plan to see what you can come up with. It kind of forces your brain to be creative. By doing so, you learn more about yourself and your process.

Showing off my pretty black on silver nail art with white dots while holding a flower pot.

In any case, I've been really busy lately, we're going to Mexico in a few weeks to visit family and I've been planning everything we need to bring. It's the first time we're going out of the country since we discovered our son is allergic to eggs. I'm not sure if I should bring food like bread and noodles with us. Stuff I know could be hard to find without eggs...

I can't wait though, we planned on going to the beach! It'll be our kids' first time so we're super excited to see their reaction and show them a whole new bunch of things; digging holes, building castles, getting buried in the sand... you know, the usual. :) Until then, I'm going to be working in my newly painted office and doing pretty Easter crafts.

You'll have to excuse my hands in this tutorial, they're so so so dry. The winter's being particularly difficult and I've been washing my hands like crazy to not catch any viruses before we leave on vacation. I also have been neglecting moisturizing... shame on me!

So yea, here's my super dry hands with pretty simple nail art. Lol. Enjoy!


MATERIALS

Silver nail polish
Black nail polish
White nail art pen
Top coat

Materials for black on silver nail art; black and silver nail polish, white nail art pen, top coat polish.


STEPS

1. I applied 2 coats of silver nail polish. I do this on all my nails to give it a bit of time to dry before step 2.

2. Using the brush the polish came with, I made a brush width line down the center of each nail. Don't worry if it's not exactly straight. When I do this, I don't usually wait until the base polish is dry, even if it's still a bit damp I keep going.

3. With the white nail art pen I made little dots in a straight line right in the middle of the black stripe I just made. Again, you don't really need to wait until the previous step is dry.

4. Apply top coat and that's it! I use seche vite.

Apply silver top coat.
Paint thick black line in the middle of the nails.
Paint little dots on the thick black line using a white nail art pen.
Pretty nail art. Super simple, thick black lines over silver base coat with little white dots. A fun afternoon mommy date activity. Click through for tutorial.

Nail Art: Bare Daisies

Little white and yellow daisies on bare nail. Super cute and quick nail art.

I've always dreamed of running through endless fields of flowers; the sweet fragrance, the cool breeze and the pure air. Wouldn't it be amazing? Just thinking about it makes me feel so free and happy. Living far away from the city, living off the crops we grow and the livestock we raise. Having all the time in the world to take care of my kids. For now though, I'll just have to settle with drawing flowers on my nails.


Have you ever had the chance to run through fields of flowers?


For this nail art I was looking to create something super quick, fresh and simple. I was playing around with my dotting tool trying to find different ways to use it and it occurred to me that I don't even need to put a base color before making my design. I love the clean look of this new nail art and I'm already planning other bare nail designs.


MATERIALS

White nail polish | I'm using Blanc by Essie
Yellow nail polish | I'm using Lightening by Sally Hansen
Dotting tool | I'm using on for Sephora


STEPS

1. Using the dotting tool, in a circle, place 5 dots in a circle to form the petals of a flower. Do this as many times as needed to create the desired pattern as shown in the picture below.

If you don't have a dotting tool you can use the tip of a pencil instead, or even a toothpick, anything will work.

2. Paint and yellow dot in the center of each flower and add a clear protective top coat.

Make little clusters of 5 white dots on bare nails.
Add a little yellow dot in the center of the white dot clusters to make little daisies on bare nails. Click through for tutorial.

The more nail art I create the more I realize how much I enjoy being creative. With all the things I want to do every day, and the little time I have, this is definitely an activity that I seem to find time for. When I first started doing nail art I thought "Oh-My-God, this will take for-ever"... but you know what? It doesn't. It really doesn't. What takes the longest is thinking up what you're going to draw and which colors you're going to use. Once that's settled, the actual art takes a few minutes (obviously we're not creating anything super fancy here). If you add a quick drying top coat like Seche Vite, it'll be even faster. You should give it a shot if you haven't already!