birthday

DIY: How to Make Faux Starfish

Faux starfish DIY turorial using polymer clay.

Hi guys!

As some of you may know, last year at around this time, I gave birth to a second beautiful baby boy. It's been a true blessing to be surrounded by so much pure joy and love. Alas my return to work was inevitable, and so a new life has begun.

Other than my return to full time employment, a lot has happened since I last posted. We planted our garden and worked on our yard a lot. We visited the zoo and spent some quality alone time together as a family. I also had to slowly integrate my 1yo to daycare (my heart just shattered right there), we took turns being sick (ugh!) and dealt with loss. It's just been a rough few months and we're not out of the woods yet.

On a happier note, both of my boys celebrated their birthday this month, so I spent a lot of time in decor & food projects. As I'm sure a lot of you can relate, not all of my projects worked out quite as planned.

First, there was the beach look-alike cake I tried to make. I made a white cake and crumbled it so it would look like sand. I put the pieces in a cake mold to cover half the space, then I added a cookie sheet to put blue jello on the other side (you know... water). The cake ended up super dense because I pressed it too much, and the jello ended up soaking the edges of the cake. Anyway, it was a complete failure, but we ate it anyway!

Then there was the fire mantle which I thought would look awesome painted gold. It does not. I mean, it doesn't look bad, per se, but it sure as hell don't look like I thought it would. It just looks too gold. You know? Anyway, it's going to stay like that for a while because with my full time job, among everything else, I just don't have time for the details.

I also made a kind of starfish/flower birthday crown for my baby. It looks OK, but it's not fabulous. To be honest, I probably tried to be too fancy with my ideas. Sometimes simple is best.

I made a ton of other things with random materials and props, like fabric, cardboard, flowers, paint, shells, faux starfish, glitter, glue... and I will be sharing those which I had time to photograph.

For the projects that didn't plan out, I'll be posting some of them anyway since they technically still are good ideas. I might give them an update in the future, see if I can make it work better. Who knows, it might inspire someone!

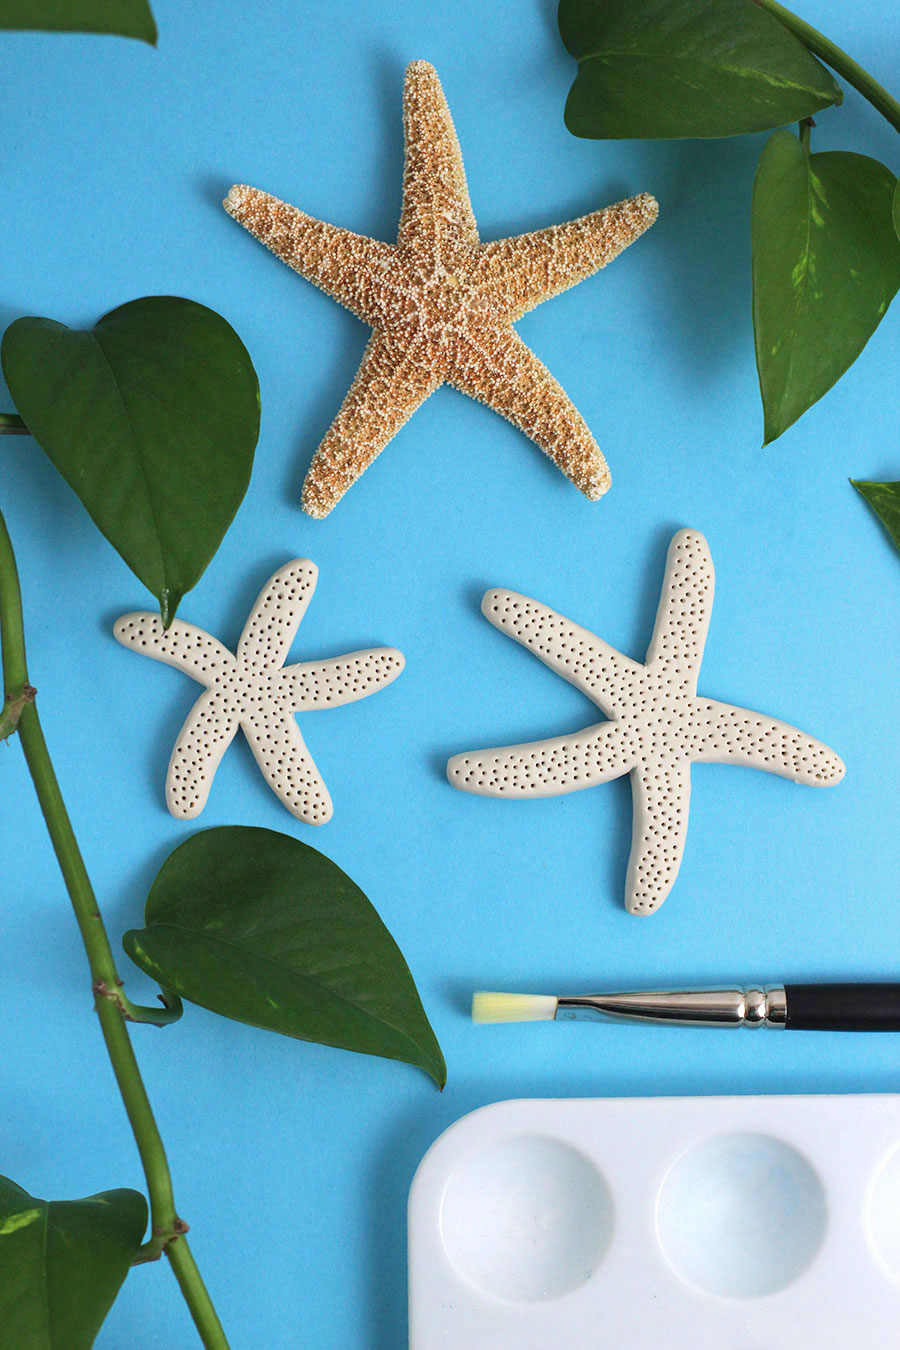
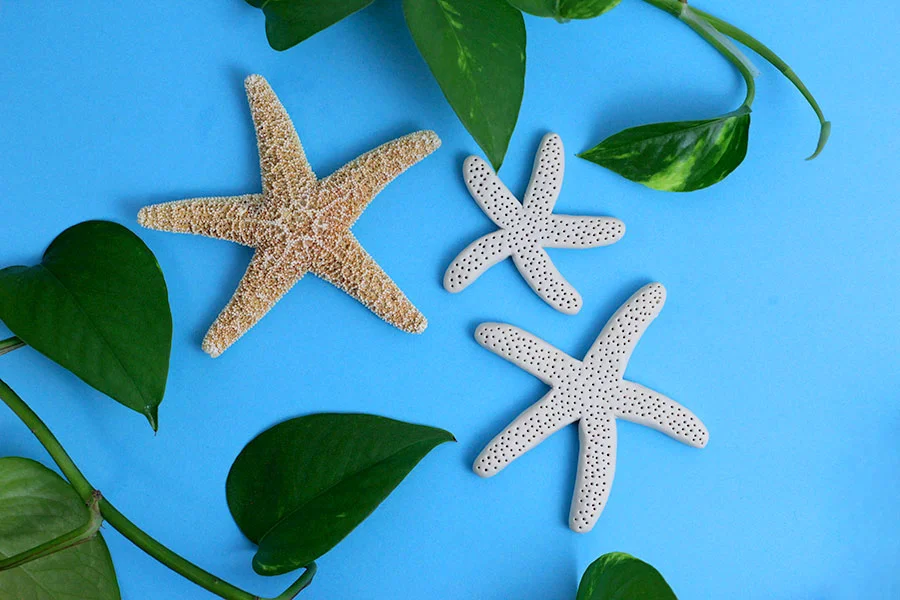
Without further ado, here is how I made faux starfish with polymer clay for my littlest's beach themed party.

How to make faux starfish with clay. Super easy step-by-step on how to create faux starfish from scratch. Great for crafts, home decor projects, or just for fun! Click through to find out how.

Materials

Polymer clay (I used Sculpey, but I prefer Fimo)
Acrylic paint


Tools

Exacto knife
Toothpicks
Cookie sheet
Paint brush
Paint palette

Materials for faux starfish.

Steps

1. Warm up you clay by working it with your hands.
2. Make a ball then flatten it.
3. With an exacto, make 5 triangle incisions & remove the extra clay.
4. Round off the edges with your warm hands.
5. Using a toothpick poke little holes over the surface of your faux starfish.
6. If you plan on hanging them, push a hold through one of the arms. (Optional)
7. Bake according to the manufacturer's instructions.
8. Paint as you see fit; I mixed white and orange together to make my starfish a pale orange-y color.

Step by step tutorial of how to make faux starfish with clay.

There you have it! Beautiful starfish using clay.

I used these in a number of projects so stay tuned, in coming posts, I'll be showing you a few things you can make with your beautiful faux starfish!

DIY: Wire Birthday Crown

wire crown.png

This tutorial is a bit overdue since it's the crown I made for my son's second birthday; which was over a month ago... but so much has happened since then that I'm sure you'll forgive me.

Like any mother out there my goal is to do everything I possibly can for my children; this of course includes birthdays. I'm not one for huge parties but I do love to decorate and plan celebrations. I don't usually do anything fancy, but I do tend to get creative, so I decided to start documenting some of these projects hoping to inspire others to use every excuse possible to have some fun with colors and textures!

Have you ever made a birthday crown? What kind of materials did you use?

On my son's first birthday I used felt to make his crown. It was really pretty but didn't hold too well. This time I decided to try something a little sturdier. I had wire lying around which I was planning to use to make a wire wrapped stone pendant (still haven't gotten around to it, ah!), so I decided to use some and try and make a wire crown.

This project was inspired by the wire art of Five From The Ground.

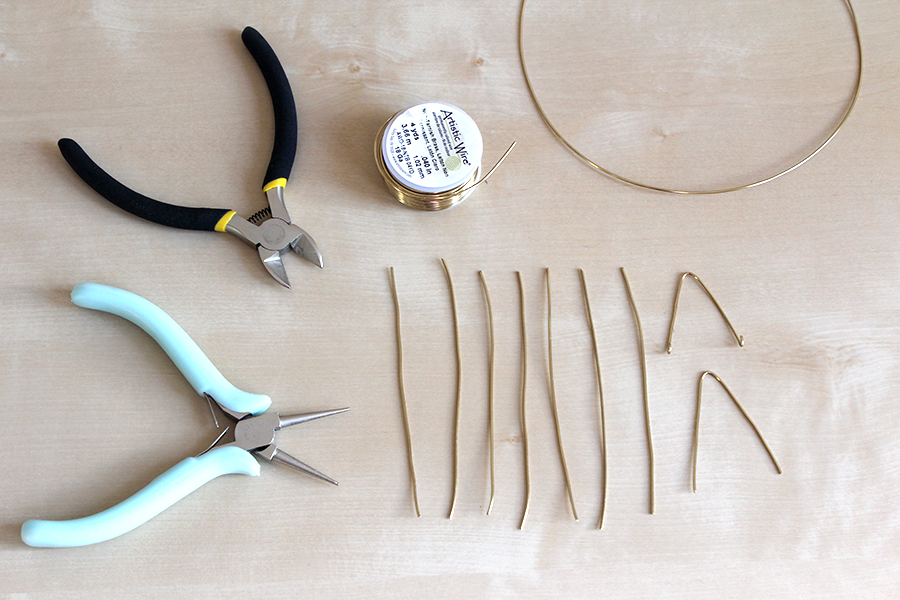
Materials

Wire
Round pliers
Cutters
Glue gun

materials for wire crown.png

Steps

1. Measure the head circumference of the person who will be wearing the crown and cut a piece of wire that's a bit longer. Form a circle as shown in the picture below then wrap the ends with the round pliers to attach it.

2. Cut 9 small strands of wire (approximately 3 inches long); you can cut more if you want more points to your crown. Bend them into triangles using your round pliers. Bend both ends of each triangle to attach to the crown.

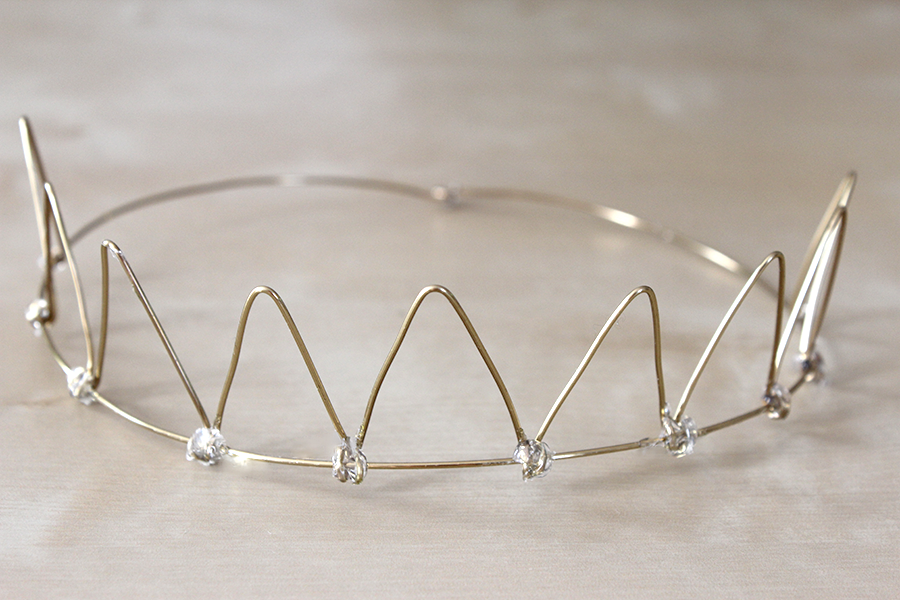
3. Secure the wire triangles onto the circle you created earlier by pressing on the curled ends then further secure using glue.

making a birthday crown with gold wire.png
pieces of wire crown diy.png

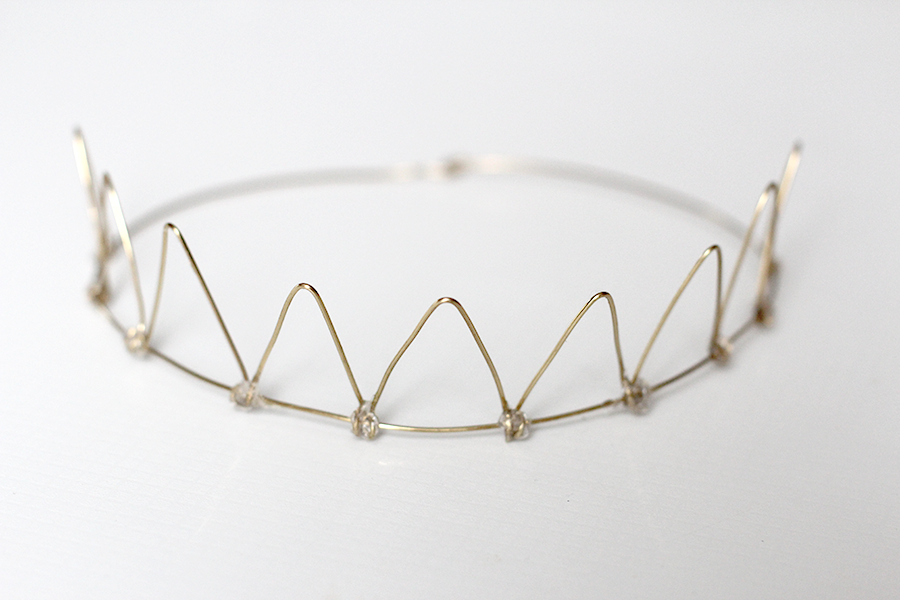
Place on the head of the king or queen. :)

This is by far the favorite crown I've made so far. It's totally cute and my son loved it. It did look a bit uncomfortable since the building medium is hard, but this can easily be fixed by using a softer (thinner) wire. Enjoy!

wire birthday crown diy.png

DIY: Circular Cupcake Toppers

blue and white 1 year old cupcake toppers.jpg

These are the cupcake toppers I made for my son's first birthday last year. I was looking for something easy to start with in terms of cake decorations. I didn't have any special cutters or punches so I decided to go with circles. Anyone can find a circular shape in their home to use as a tracing model right? I actually used a couple of shooter glasses (gasp! - I have no idea where they came from, seriously).

Even though my little munchkin didn't end up eating any of the cake I made (good thing too because he ended up being allergic to eggs... !), I originally thought cupcakes would be a better option for a baby because they can destroy their portion (yep, that's pretty much what babies do to cakes) without touching everyone else's (an option I will choose again this year - egg free of course).

Materials

2-3 pieces of 12x12 card-stock (of different style/color)
Toothpicks

Tools

Scissors
Modpodge & Paint brush (glue works too)
Pencil & Eraser
Marker
Models (I used two shot glasses)

3 12x12 cardstock and toothpicks for cupcake toppers.png
cupcake toppers scissors mod podge pencil eraser.png

Steps

1. Trace your models on the cardboard using the pencil. I did 3 different sizes each on a different color of card-stock to add depth.

2. Cut all the circles. Yes, it would be much faster if you had punches, but I didn't, so it took me longer but was cheaper! :P

3. Assemble all the circles as shown below. Write the desired text on the inner circle (in my case I wrote 1 for my son's first birthday) and glue to a toothpick.

4. Rinse and repeat.

trace circles on paper.png
glue different size circles together cupcake toppers.png

...and here's the assembled product! Totally cute right? Took forever but I had so much fun! Plus it gave my husband and I a chance to talk without being distracted by our computers and phones. Lol. Life before technology!

lots of blue and white circle 1 year old cupcake toppers.png
first birthday boy cupcakes cream cheese no eggs.png