
Ever since we bought our first home 2 years ago, I've been wanting to decorate. DECORATE! Every time I run ideas by my husband though, more often than not, I'm faced with rejection. At first I wanted to try a false brick wall. He said no because he was worried that if we didn't like it, we wouldn't be able to remove it. Ok, I agree. On to the next idea; wallpaper. That got the same response. A white trim at 1/3 of the wall got a maybe.
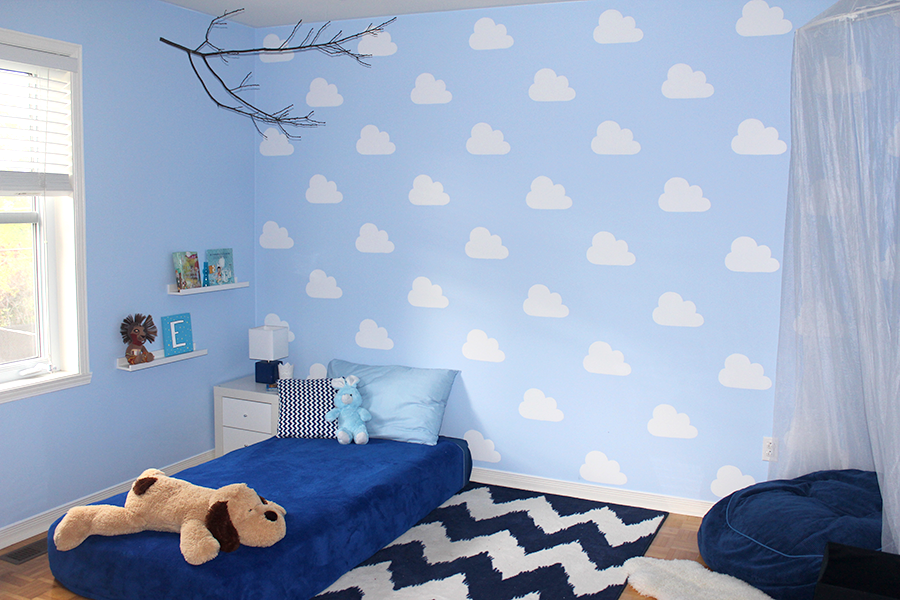
Then I saw this super cute wall on Mer Mag and the stencil idea got a yes because it could easily be painted over. Oh my god a YES! After that, I just knew I had to try to make my own. I wanted to paint clouds on my son's wall so bad that I was dreaming about it every night. Ok, maybe not that much, but I just couldn't shake the idea. I'm glad I ended up doing it because it makes the room look so much brighter.
I haven't finished decorating yet but the new accent wall is one step closer to making the room complete. I've been trying to make it a bit of a Montessori style and I'm really glad I did. My son just loves having everything at his level. He does belly flaps on his bed and takes pride in aligning his book neatly on the little shelves. He's just too adorable this one.
MATERIALS
Paint
Sponge roller
Paint dispenser (or whatever that black thing you pour the paint into is called, lol)
Painter's tape
Pencil
Paper
Clear paper
X-Acto Knife

PROCEDURE
1. To start, I drew the shape I wanted on a piece of paper. It took me a few tries to get exactly what I wanted but it turned out super cute. At this point you can draw pretty much anything you want. You could even do geometric shapes.
2. Using an X-Acto (and a piece of cardboard to protect my surface), I cut out the shape.
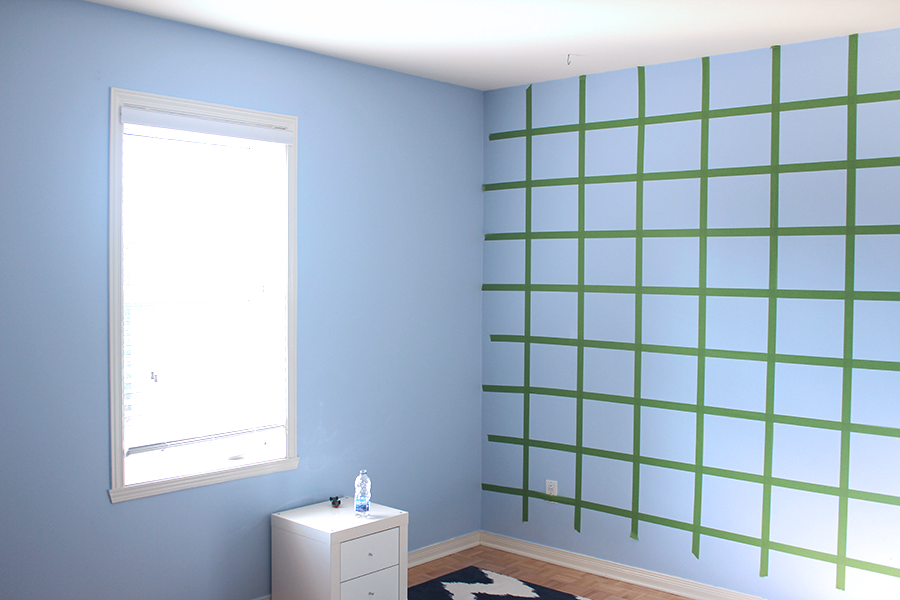
3. I stuck a grid on the wall using painter's tape. Each square is the same size as the piece of clear paper I cut my stencil out of.
4. I taped the stencil in one of the squares and painted the shape with the roller. At first, I thought if I used a tiny bit of paint, that it wouldn't go under the stencil and ruin the shape, but it did because I had to go over it so many times. I then tried by rolling an ample amount of paint on right away and it was much better. I also tried to roll the paint from the outside in as much as possible. Every time I moved my stencil to another square, I made sure to wipe any excess paint off from the under side. Oh, and please don't laugh at my funky hairdo. It was one of those days. ;)
5. I painted a cloud in every other square on the grid and did opposing squares in the next row.


Overall, this project took about 2 hours but I went back over the shapes the next day just to make sure they were well painted so it took me just over 3 hours total.
When my 2 year old son saw me painting clouds on his wall his initial reaction was: "Waaaoooow"... and he just kept repeating it every time he entered his room. I'm pretty sure that means I won. God I love that little mister.
