Crafts + Decor

DIY: Sugar Skull Candy Bowl

Make a bright and colorful sugar skull candy bowl to decorate your home for Halloween. Click to see the tutorial.

Yep, it's that time of year again!

I had so much fun making my Halloween apothecary last year that I've decided to get creative again this year.

Halloween is one of my favorite time of year to do crafts and decorate. There's just so much creative freedom. You can get as wild as you want and no one will blink twice.

I actually started this project last year but never got around to finishing it. You know how it goes right? You start a million projects on an inspiration wave, then you loose it and half of those projects get forgotten in a distant corner of the house for a few months...and sometimes more.

Does anyone else do that?

I've also been known to go into a craft store for a very specific thing and come back out 3 hours later with half the store in my bags. Oh, did I mention my very awesome and patient husband was waiting in the car the whole time?

Yea, he doesn't come anymore. 

Back to my project. So I saw this skull at the dollar store and I immediately thought it would be fun to turn it into a sugar skull to decorate my living room.

When I shared my idea with my husband, he mentioned it would be cool if it was a candy bowl. I swear, he's totally a creative inside. So off he went to drill. Awesome right?

So anyway, this super skull is chilling on my table right now, but I took out all of the candy because otherwise, my toddlers will at them all in a single sitting.


Have you created anything for Halloween? Are you making your own costume? What will you dress up as?


My boys and husband have asked to be the 3 musketeers so that's what my next project is going to be. If you're looking for me in the next 2 weeks, I'll either be raiding the dollar store or at my sewing machine.

See you all next week! :)

The materials to make a Halloween sugar skull candy bowl; skull, paint, paint brushes, sparkles, flowers.

MATERIALS

Plastic skull
Acrylic paints
Paint brush
Palette
Artificial flowers
Glue gun
Candy (!!)

Spray paint your skull white first.
Cut a hole at the top of the skull and paint a face in black.
Have fun, add shapes and color to your sugar skull candy.
Glue some artificial flowers around the hole of the skull and fill it with candy!

STEPS

1. Paint the entire skull white. I used spray paint but you can just as easily use a paint brush and acrylics.

2. Cut a hole at the top to insert your candy. I asked my husband to do it with his hand drill, it took him about 2 minutes.

3. Paint the eye sockets, nose hole and teeth outline in black. You can use any color you want at this point, have fun and be creative!

4. Decorate with pretty patterns around the eyes, the forehead and chin. You can embellish with faux jewels or even glitter!

5. Cut some artificial flowers and hot glue them around the head to form a flower crown. I glued them around the hole.

6. Fill with candy and enjoy!

The complete Halloween sugar skull candy bowl. A super fun craft for Halloween. Click through for tutorial.

DIY: Basic Shea Coconut Lip Balm

Homemade-natural-lip-balm-DIY-tutorial-using-shea-butter,-coconut-oil-and-beeswax.-It's-super-moisturizing-and-can-make-a-perfect-quick-homemade-gift-for-family-and-friends.

Ever since I made my homemade + natural moisturizing lotion recipe , I've been on a quest to eliminate as many chemicals from my home as possible. Some of it involves making my own products like these homemade baby wipes. I've also been trying out a few cleaning and body care products from different brands.

It's been quite an intense journey to be honest, mainly because my life has been on overload recently, but also because I never realized just how many chemicals are around us on a daily basis, it's actually kind of scary! Anything from our skin care routine, to bathing, to cleaning our home, in our food, even our mattress and our car contains harmful chemicals, can you imagine?

With that being said, I have no intention of turning into a full on Green Holistic Naturalist (or whatever you call people that are 100% natural living) but I do hope to find some kind of balance and be more intentional in my everyday life without compromising my happiness and that of my family. Life is just to short to not enjoy everything you love.

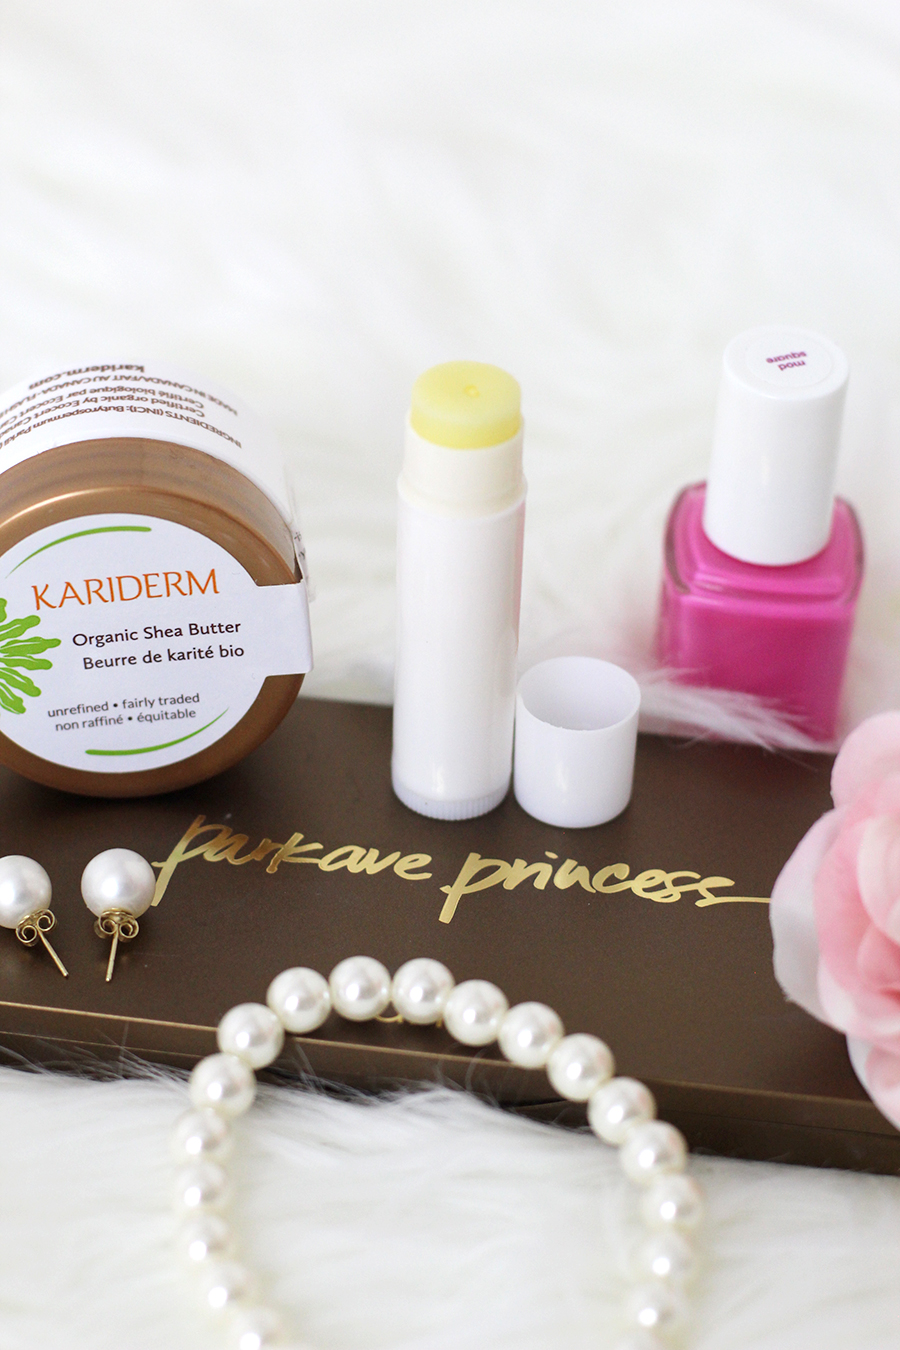
Today I want to share with you a super easy basic shea coconut lip balm recipe. I'm using raw, pure and fair trade Shea butter from Kariderm. It's my absolute favorite product from their company. The texture is super light, it absorbs quickly and has intense moisturizing action. I use it in practically all of my homemade body care products.

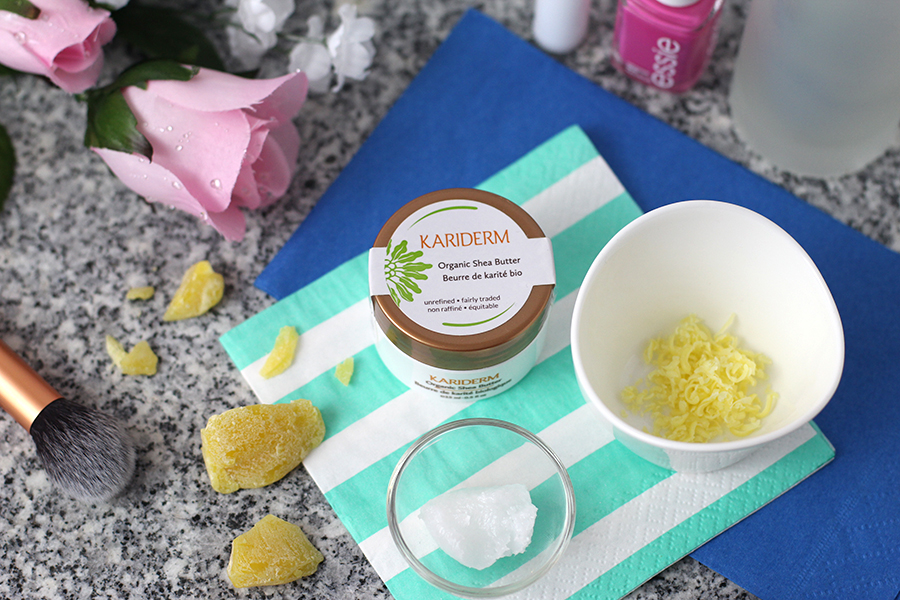
These-are-the-3-ingredients-it-takes-to-make-shea-coconut-lip-balm;-shea-butter,-coconut-oil-and-beeswax

Materials

1 tsp Shea butter
1 tsp Coconut oil
2 tsp Beeswax (grated)

Tools

Glass bowl
Pot
Pipette
Lip balm tube

Steps

Heat all ingredients in a glass bowl over a hot pot of water, on low heat. If you have a double boiler, you can use that too. When I'm in a hurry, I do it in small increments in the microwave, but I really don't like using the microwave too much so the stove top is my favorite way. Once everything is melted, mix it a bit, then transfer the mixture to the lip balm tube using the pipette (the recipe is enough for 2 tubes). Wait until it cools and enjoy!

This is super quick and easy to make and it's surprisingly moisturizing. It's been my go-to natural lip balm for quite some time now and although I keep trying different brands once in a while, I always return to my homemade one. It's also a super fun, thoughtful and intentional gift to make for your friends and family.

What kind of skin care products have you tried making at home?

Quick-and-easy-natural-lip-balm-DIY-tutorial-using-shea-butter,-coconut-oil-and-beeswax.

Disclaimer: This post was sponsored by Kariderm. The Shea butter was sent to me at no cost. All thoughts expressed in this post are my own.

DIY: Faux Starfish Garland

Faux starfish garland.

Not so long ago, I shared how to make faux starfish. I originally made them to decorate my son's birthday party, little accents to put on the table and on the shelves, but I ended up liking them so much that I started making other things with them. Like this new faux starfish garland!

Last year, I decided to change my living decor with each season. I've been working on different color combos and experimenting in the past year, and it will definitely evolve over time (what doesn't right?) but for this summer, as you noticed from my brushstroke wall art, I decided to go with a beach/ocean theme with peach/orange and mint/green as my accent colors. 

I really enjoy decorating and creating new pieces for my home. The process is slow because of everything else I need to do in the little time I have, but every time I sit in my living room, ideas just keep coming.

What color combo have you chosen for your living room decor? Do you go for bright colors or more neutral ones? Do you like changing things up once in a while? 

Materials

Faux starfish
Rope
Tule ribbon
Thread

When you're making the starfish for this project, make sure that you poke a hole through one of the legs of the star so you can hang them. You can do this with a toothpick.

Steps

Put the rope and the tule side by side and attach the starfish (through the hole!) at set intervals. You can measure about where you'd like the stars to be using a ruler. Then you hang it! I have little nails on my fireplace where I usually hang our Christmas stockings so I use those to attach the garland at every star, if you don't have those, you can simple add little push pins that you can remove later, or just hang it from each end (it'll give a slightly different look, but still fun!).

There you have it. I seriously love the end result.

Materials to make a decorative faux starfish garland.
(DIY) How to attach faux starfish to rope and tule to make a pretty garland.
DIY faux starfigh garland to decorate your fireplace.